Introduction
Custom championship belts are no longer just for wrestling matches or boxing titles. Today, they’re used in offices, schools, charity events, gaming competitions and even birthday parties. A well-designed belt makes a simple event feel like a grand occasion. It adds energy and competition, and turns the winner into a champion.
But if you’ve never created a belt before, it can feel confusing. Where do you start? How do you design something that looks good and fits the moment? This guide will walk you through everything step by step. By the end, you’ll know exactly how to build a belt that’s personal, impressive and unforgettable.
Why Choose a Custom Belt
You could always go with a trophy or medal. But a belt? It commands attention. People want to hold it, wear it, take photos with it. It’s bold, fun and full of personality.
Whether you’re organizing a sports league, honoring your team’s top performer or branding your own event, a belt gives you the perfect mix of creativity and recognition.
Step 1: Define the Purpose
Before anything else, decide what your belt will represent. Is it for a winner? A yearly achievement? A company challenge? The goal of the belt shapes its size, color, message and tone.
For example, a belt for an esports champion might look very different from one for a sales contest. Write down what the belt is for and who it’s for. That clarity helps in every step that follows.
Step 2: Choose the Main Elements
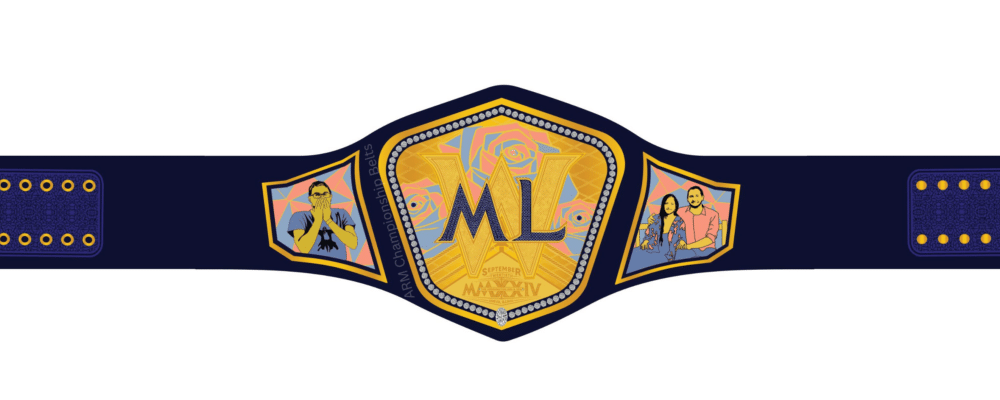
Every championship belt has three main parts.
The center plate is the large metal plate in the middle. This is the heart of the belt and usually carries the title or logo.
Side plates are smaller plates on the left and right. You can leave these blank or customize them with names, dates or logos.
The strap holds everything together. Most belts use black or brown leather but you can pick from many colors depending on the theme.
Step 3: Add Personal Touches
This is where it gets fun. You can add a company logo, team name for example a marketing team can write off it’s name on the belt, slogan, mascot or anything else that gives your belt character. Think of colors that match your brand or event. Choose a font style that’s bold and easy to read.
Less is more when it comes to design. You want your belt to be eye-catching but not messy. Stick with a few strong elements rather than trying to cram everything in.
Step 4: Select the Right Material
If you want the belt to feel real, go for metal plates and genuine leather. These materials give weight and shine. If budget is tight or the belt is more for fun than formal awards, you can choose synthetic leather or lighter metal finishes.
You don’t need to spend thousands to get something that looks and feels great. Many makers now offer different pricing levels so you can find something that fits your budget.
Step 5: Work with a Belt Maker
Once your design is ready, you’ll need a company to bring it to life. This is the most important step. A good belt maker will guide you through size, plating, mock-ups and delivery.
If you’re looking for a trusted place that offers both full design control and excellent quality, visit this provider of custom championship belts. They let you personalize everything from strap color to engraving and have experience with sports teams, corporate groups and even international buyers.
Step 6: Approve and Finalize
After submitting your ideas, most makers will send you a digital preview. Take your time reviewing it. Check for any spelling mistakes, wrong colors or incorrect logos. This is your last chance to fix anything before production.
Once confirmed, the belt goes into production and usually arrives within a few weeks depending on the maker and location.
Step 7: Present It Like a Pro
Now that your belt is ready, think about how to present it. A dramatic entrance with music and spotlight? A speech before handing it over? Even the presentation adds meaning to the moment.
Use the belt as a tool to build hype. Post it on social media. Make it the symbol of your event. Let it speak for your brand, your energy and your commitment to making the experience memorable.
Why It’s Worth the Effort
A custom wrestling belt isn’t just a reward. It’s a memory. It makes people feel recognized and celebrated. It gives your event or brand a level of detail that people will talk about long after it’s over.
That’s why more teams, businesses and creators are turning to custom belts instead of simple trophies. They’re more than an award — they’re an experience.
Conclusion
Creating a custom championship belt doesn’t have to be hard. You just need a clear purpose, a few ideas and the right team to build it. From start to finish, every part of the process lets you express something unique about your brand or event.
And when you finally hand over that belt to the winner, you’ll know it was all worth it. The smiles, the cheers and the photos will tell the full story. So go ahead. Build something awesome. Let your belt do the talking.
FAQs
How long does it take to make a belt from scratch
Usually between two and four weeks depending on design and shipping time.
Can I make one belt or do I need to order many
One belt is fine. Most providers accept single orders without requiring bulk.
Is designing hard for someone with no design skills
Not at all. Most belt companies will help you shape your idea even if you have zero experience.
Can I change the belt design later
Once a belt is produced, it can’t be changed. But you can always place a new order with updates.
What if I want something totally unique and not found in templates
Most custom belt makers allow full custom work where you can build your design from scratch.

Source: How to Create a Custom Championship Belt for Your Event or Brand